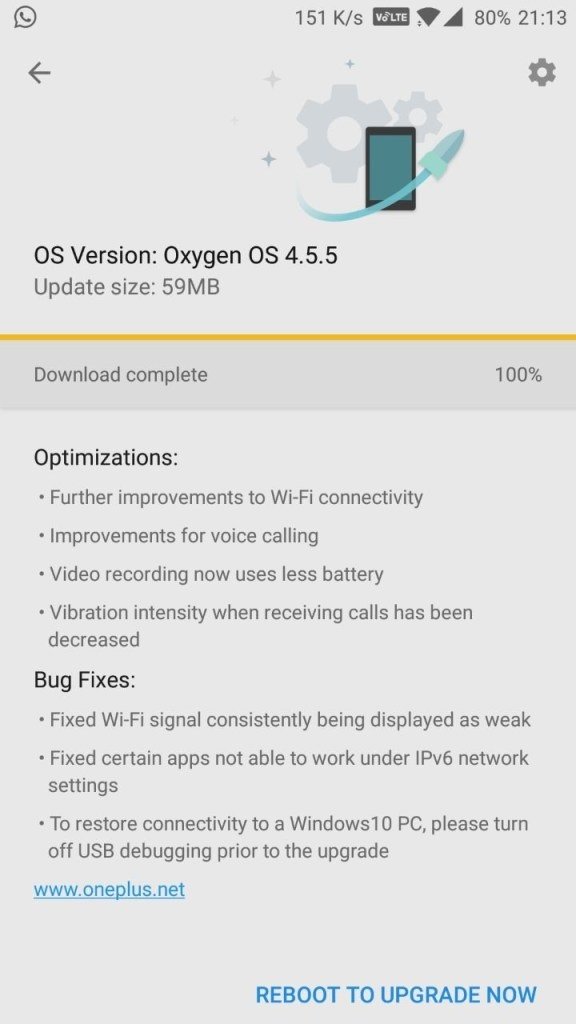
Just in a week, another update rolled out for the Oneplus 5 users. This time OxygenOS 4.5.5 For OnePlus 5 is released and come with lots of fixes like Wifi Connectivity, Voice Calling, battery performance fix and lots more. You can check out the full changelog below. The OxygenOS 4.5.5 for OnePlus 5 rolling out via OTA and soon will be available for all, you can check this update your phone settings System update. If you can’t see any OTA update, then you can install the same manually on your phone.
As per the Oneplus team, this one is the huge update of the Oneplus 5 users and fix almost all the problems on the phone. The update patch is based on the Android 7.1.1 nougat and the size of the OTA update is near about 59MB. To Download OxygenOS 4.5.5 For OnePlus 5 read our full guide and do the same on your phone.

OxygenOS 4.5.5 Change logs
Optimizations:
- Further improvements to Wi-Fi connectivity
- Improvements for voice calling
- Voice recording now uses less battery
- Vibration intensity when receiving calls has been decreased
Bug Fixes:
- Fixed Wi-Fi singal consistently being displayed as weak
- Fixed certain apps not able to work under IPv6 network settings
- To restore connectivity to a Windows 10 PC, please turn off USB debugging prior to the upgrade

Download OxygenOS 4.5.5 For OnePlus 5
- OxygenOS 4.5.4 to OxygenOS 4.5.5 OTA for OnePlus 5 – Download
- OxygenOS 4.5.5 Full ROM for OnePlus 5 – Download
How to Install OxygenOS 4.5.5 for Oneplus 5
Method 1 for Stock Recovery Non-Rooted users
1. Download the OTA zip from the above mention link and place it in the root folder of your OnePlus 5.
2. Go to phone Settings > System Updates > Settings Icon > Local Upgrade & Select the ROM File
3. Once selected system would prompt upgrade now.
4. Select upgrade now and system would reboot into stock recovery and flash the Oxygen OS 4.5.5 update.
5. The installer would itself flash the ROM and reboot the device.
The Oneplus 5 will reboot and your phone is now running on the latest OxygenOS 4.5.5 firmware & OS based on 7.1.1 Nougat.
Method 2 for TWRP Recovery Rooted users
If you are the Rooted Oneplus 5 user which unlocked the bootloader of Oneplus 5 and installed the TWRP recovery then you have to use this guide. If you face some problem during installation then read our detailed guide how to update Rooted Oneplus 5 with Latest OxyhgenOS.
1. Download the Full ROM from the above mention link and place it in the root folder of your OnePlus 5.
2. Boot your Phone in TWRP recovery mode. To do this Switch off your phone and Hold Power + Volume button.
3. Once you are in TWRP mode. Tap on Wipe > Advance Wipe > Select Dalvik & Cache > Swipe to Wipe .
4. Now, Go to Install and locate the OOS 4.5.5 Full Rom Zip & swipe to Install the ROM file.
5. Flash Magisk Or SuperSU to maintain root (Optional)
6. Wipe Dalvik & Cache and Reboot System.
Video Guide for Rooted Users to Install OxygenOS 4.5.5
Now you successfully flash the OxygenOS 4.5.5 Firmware on your Oneplus 5 phone and the first boot may take some time to make some changes on your phone. If you have any questions? Do let us know that in the comments below.

Hi,
I have a problem, I rooted my phone and installed TWRP. It booted to my stock OS , I went back to TWRP to clear cache but I actually clicked on format data and typed yes.
Now my phone constantly boots into TWRP, there is no OS installed, for this I downloaded Freedom OS and tried to flash the zip, it installs and reboots my system but I end up rebooting back into TWRP. I checked the sd card folder throught TWRP but I see no android files there. The internal storage is empty. I even tried to flash the 4.5.5 OTA but its the same. The phone bootloops back into TWRP.
I am unsure what to do now. Can someone please guide me ?
I also have the one plus recovery image file downloaded. I am not a pro at rooting but I can try following instructions.I use a mac and have the adb and fastboot drivers with me.
Don’t Worry. First, install the latest TWRP from the link that i gave.
After that Download, the FULL ROM file of OXygren OS 4.5.5 and install the same by following method.