If you are sharing your PC with your family members or friends and don’t want to share your personal files with them. Best way to do this is to lock those folder and file with password, so no one can access without it from your permission. There are thousands of apps are available which helps you to do the same. But most of them are paid one and some of them are infected with malware. So today we will share a tip with you, which allows you to create a password protected folder without any application.
Yes you heard it right, no need to install any app to lock your folders and files. Tutorial is very simple it will 5 to 10 minutes to apply this on your PC. After this you can lock and secure all your personal files easily. Follow the below tutorial to get started.

How to Create Your Password Protected Folder
Step 1. Create a new folder on your desktop to start the process and give the folder a name.

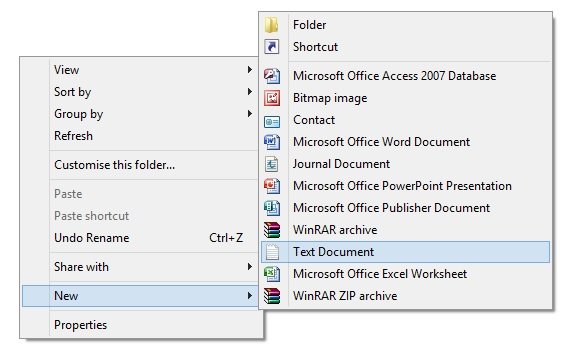
Step 2. Now open the folder and create a new Text Document, you can do this easily from the context menu.

Step 3. Now Open the new test document and paste the following contents on the text document.
cls

@ECHO OFF

title Folder Private

if EXIST "HTG Locker" goto UNLOCK

if NOT EXIST Private goto MDLOCKER

:CONFIRM

echo Are you sure you want to lock the folder(Y/N)

set/p "cho=>"

if %cho%==Y goto LOCK

if %cho%==y goto LOCK

if %cho%==n goto END

if %cho%==N goto END

echo Invalid choice.

goto CONFIRM

:LOCK

ren Private "HTG Locker"

attrib +h +s "HTG Locker"

echo Folder locked

goto End

:UNLOCK

echo Enter password to unlock folder

set/p "pass=>"

if NOT %pass%== PASSWORD_GOES_HERE goto FAIL

attrib -h -s "HTG Locker"

ren "HTG Locker" Private

echo Folder Unlocked successfully

goto End

:FAIL

echo Invalid password

goto end

:MDLOCKER

md Private

echo Private created successfully

goto End

:End
Step 4. Change the PASSWORD_GOES_HERE text with your personal password that you want to create to secure the folder.
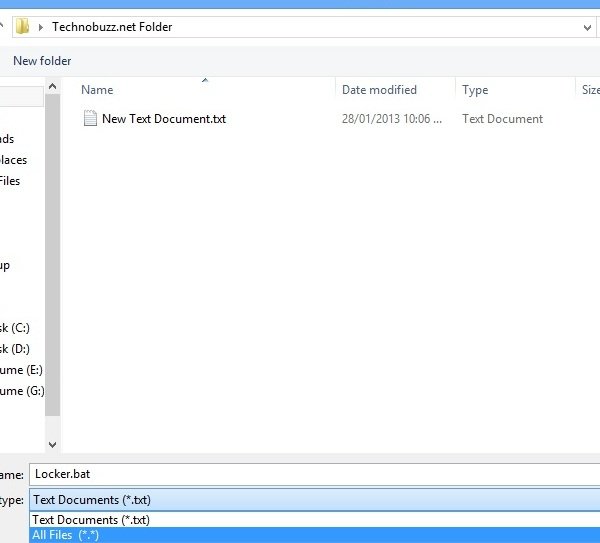
Step 5. Now save the text document as locker.bat name. (See the screenshot below)

Step 6. Once the locked.bat file saved in the folder you can delete the original text file.

Step 7. Now time to run the Locker.bat file on your PC. Double click on the file and it will create a folder called Private. In this private folder you can save all your personal files and lock it with the password.

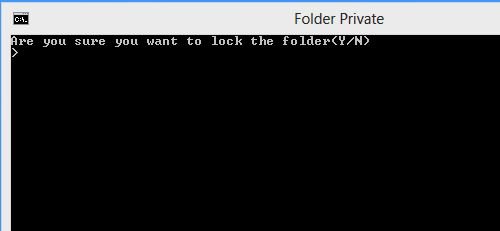
Step 8. Store all you files on the private folder and click the locker.bat file again to lock the folder. Now an new windows will appear on your screen and ask you to lock the folder or not. type ‘Y’ and hit enter top lock the folder.

Step 9. After this your Private folder quickly disappears and no one can see or use it.

Step 10. To gain access the folder again hit the locker.bat file again and enter the password to unlock the folder that you mention in the file and you can see the private folder and access it easily.

Thats’s it! Now you have successfully created the private folder on your windows PC. With this way you can lock all your personal file and folder without using any application on your Windows PC.

It’s not a hundred percent secure. If someone opens the “locker.bat” file using the notepad, the person can easily access the files (assuming that he knows what he’s doing)