USB driver will help you to connect your Nexus 6, Nexus 9 or any other Nexus device with the computer. So you can transfer file easily and manage your nexus from the windows PC. But most of the users are facing problem to setup the USB drivers on their Windows PC. Without these drivers, you can’t access you mobile content on the PC, and not even do basic things like copy/paste files (photos, music, documents, etc.). Here in this guide we’ll help you to setup the USB driver for Nexus on your Windows PC. The process is very simple and all you have to install the latest Google Drivers on your PC and you are done.
Once the drivers are installed, you can easily connect your Nexus device with the Windows PC and manage them easily. Without further ado, let’s see how to install Nexus driver on your Windows computer.

Install Nexus Driver on Windows
Step 1. To get started, download the Google USB latest drivers from here and extract the folder on your desktop.
Step 2. Now connect your Nexus device to the PC with a USB cable.
Step 3. Open device manager on your computer. Windows 7 & 8 users ? search for Device Manager from Start (or Start screen) and click to open.
Step 4. Now you will see the list of devices attached to your computer in the device manager. Just find Nexus device (it’ll most probably be in the Other devices list with a yellow exclamation mark), Right-click and select Update Driver Software…from the context menu.

Step 5. Now from the next screen click on the “Browse my computer for driver software”

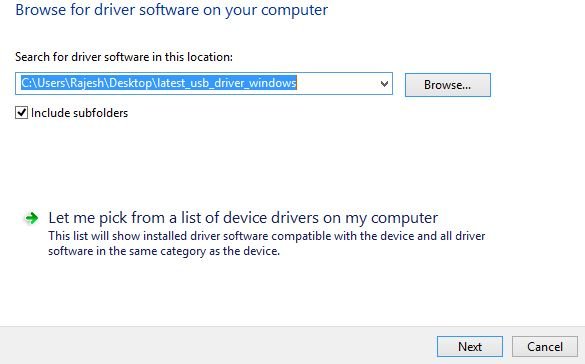
Step 6. Now click the Browse… button and select the folder where you extracted the downloaded Google USB Driver in Step 1. And don’t forget to check the Include subfolders

Step 7. Now hit the “Next” button and the driver installation process will start. During the installation (as a security check) Windows may ask your permission to install the drivers published by Google Inc. Click Install
Step 8. Once the installation is complete you’ll see a the Nexus device on the list of device manager.
