Want to setup your own Domain Email Address or Professional Email address for your business. There are so many ways to so this, if you have the Hosting account then you can get this feature on your cpanel account, but if you don’t have the hosting account and only have the domain name then also you can do this easily. One way is to buy the Google apps plan and setup your domain with Google apps and if your are looking for a free way to Setup Your Domain Email Address, here is a good news for you. Microsoft is offering a free service called “Windows Live Custom Domains”, in which they will provide e-mail services to your domain. To use this service all you need a Windows Account like Hotmail.com, Outlook.com and a domain name that you want to use as your professional email address.
So today in this article, we will show you how to set up your own Domain Email Address or Professional Email address With Windows Live (Outlook.com). The guide is very simple and take 10 minutes to setup your email address. Follow the below mention guide step by step.
Steps to Setup Your Domain Email Address With Windows Live
As we mention above to follow this guide you need Outlook.com or hotmail.com email account, you can create your free account from here. A Domain name for which you want to create your own email address.
Step 1. Go to Windows Live Admin Center here and login with your Outlook or Hotmail account.
Step 2. After login click on Get Started to start setting up your domain on Windows Live (Outlook.com)
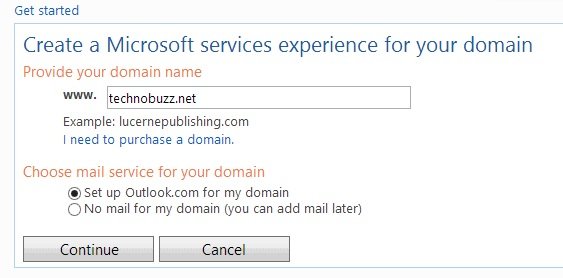
Step 3. Now on the next page you have to enter your domain name to setup your custom email address and hit the continue button. See the screenshot below:-
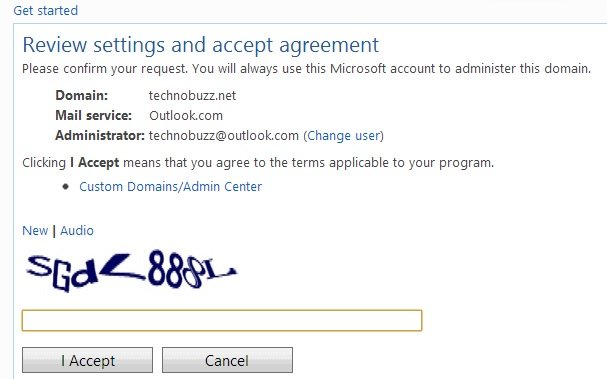
Step 4. From the next screen check out your settings like your domain name etc and accept the term and condition to setup custom domain email address.
Step 5. On the next page you can see some DNS record and settings that you have to change in your Domain Name DNS record to prove the ownership of your domain name. From this page copy your DNS MX record and change them into your Domain Host DNS Manager. See the screenshot below:-
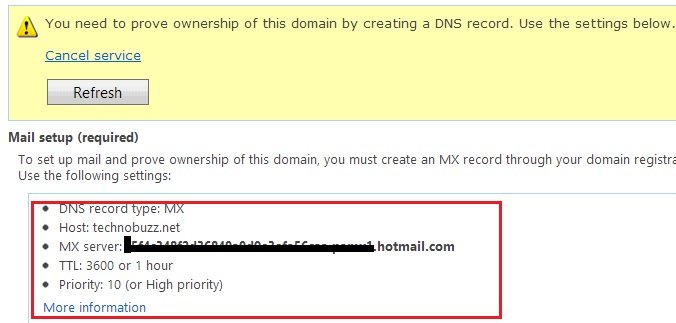
Step 6. To make this changes go to your Domain account and open the DNS manager tool. Here we are using the Godaady DNS amanger to do this change on our domain name. On your Account open the domain name DNS manager tool and add the MX records that Windows live given you on Step 5.

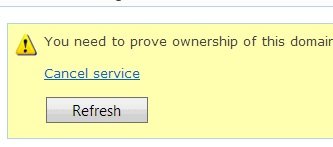
Step 7. After that go back to the Windows Live page and hit the “Refresh” button to prove the ownership of your domain name.
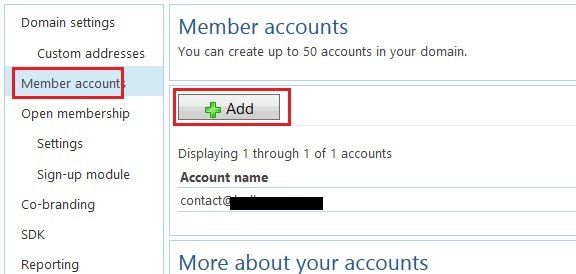
Step 8. After the successful confirmation, you will create your Domain email address from the “Member Account” Option. From here you can create upto 50 email account and setup them easily.
That’s it, now you new professional email address is setup with the windows live domain and you can use it as your business email address. Hope you like our guide, for more future tips and guide like our Facebook page here and add us on your Google+ circle here
